What is a CTF?
What tools do I need?
Tools can vary widly from depending on the type. However, for most challenges, you will need:
- A way to run Python
- A text editor of your choice (VSCode is a fan favorite)
- A way to run Linux in some capacity
Q: Can I use Git Bash instead of installing Linux
A: When you’re using Git Bash, you’re not really running Linux. For some things, it doesn’t really matter. However, if you work on binary challenges, Git Bash will not be sufficient
Linux Virtual Machine
There have been a few questions about what environment to use for assembling code/future 1337 things this semester! So in this post, I will try to cover all grounds based on what you have available to you. (Last option is my personal recommendation)
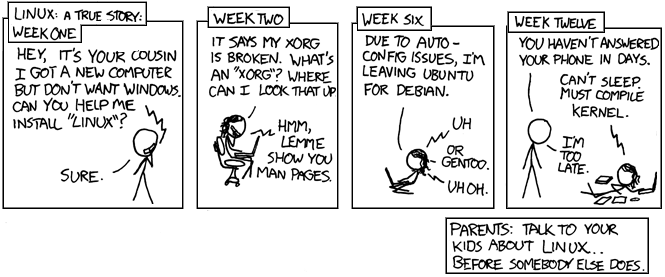
Note: You do NOT need to have this setup! You can install popOS on an old laptop or build Gentoo Linux from the source. You should choose a setup for CTFs/classes you are comfortable with, and your computer can support it! (and a setup that can get the job done)
I have a toaster, can’t run anything past chrome?
I would go with VLC! All you need to do is reserve an Ubuntu VM (Ubuntu 18.04
image) and run these commands.
sudo dpkg --add-architecture i386 # Add MultiArch support, you won't need it for 405 but you might need it for other CTFs
sudo apt update # update everything
sudo apt install -y gcc gcc-multilib gdb nasm vim # install gcc and nasm to compile code, gdb because it will come in handy later hint-hint, and vim if you want to edit code using it
I personally would scp your code over to VLC and then scp it back when you are done.
And you can look at this VSCode plugin if you don’t want to use Vim!
Based on past posts, you can see that you won’t be able to use the EOS system, but feel free to use the AFS lockers to back up your work (/afs/unity.ncsu.edu/users/<first letter from UnityID>/<UnityID>
).
I have a decent computer with at least 6GB of ram and 4 cores
You have the same option as above, but you can set up your own VM to test things on. Perks include the fact that you can drag and drop things, you can interact with the GUI, and no need to make sure all your stuff is backed up.
VirtualBox is a free alternative if you’re an NCSU student:
There are a few options for Linux Distros. Kali and Parrot both come pre-equipted with some security tools out of the gate, but it’s up to you what you want to use. Most distros provide OVA files that you can plug in directly into Virtualbox/VMWare
How to import an OVA file VMware
I’m on macOS and I don’t want to run VMWare/Virtual Box. Is there anything easier?
Use Orbstack to get a Linux x86-64 bit VM up and running in seconds.
The Virtual Machine is really slow/laggy; any other options? (Alex reccomends this)
We are going to use Vagrant to configure a Linux server to run-on Virtualbox.
So you will SSH into this VM when you need a Linux shell, and we will share a folder with it, so you can edit your code/modify binaries on your host machine, and you just run them over ssh.
This one will be the easiest to use once you set it up!
- Download and install Virtualbox .
- Install and verify installation for vagrant by following this guide.
- Save the following as
Vagrantfile
# -*- mode: ruby -*-
# vi: set ft=ruby :
# All Vagrant configuration is done below. The "2" in Vagrant.configure
# configures the configuration version (we support older styles for
# backwards compatibility). Please don't change it unless you know what
# you're doing.
Vagrant.configure("2") do |config|
# The most common configuration options are documented and commented below.
# For a complete reference, please see the online documentation at
# https://docs.vagrantup.com.
# Every Vagrant development environment requires a box. You can search for
# boxes at https://vagrantcloud.com/search.
config.vm.box = "ubuntu/jammy64"
# Disable automatic box update checking. If you disable this, then
# boxes will only be checked for updates when the user runs
# `vagrant box outdated`. This is not recommended.
# config.vm.box_check_update = false
# Create a forwarded port mapping which allows access to a specific port
# within the machine from a port on the host machine. In the example below,
# accessing "localhost:8080" will access port 80 on the guest machine.
# NOTE: This will enable public access to the opened port
# config.vm.network "forwarded_port", guest: 80, host: 8080
# Create a forwarded port mapping which allows access to a specific port
# within the machine from a port on the host machine and only allow access
# via 127.0.0.1 to disable public access
# config.vm.network "forwarded_port", guest: 80, host: 8080, host_ip: "127.0.0.1"
# Create a private network, which allows host-only access to the machine
# using a specific IP.
config.vm.network "private_network", ip: "7.7.7.7"
# Create a public network, which generally matched to bridged network.
# Bridged networks make the machine appear as another physical device on
# your network.
# config.vm.network "public_network"
# Share an additional folder to the guest VM. The first argument is
# the path on the host to the actual folder. The second argument is
# the path on the guest to mount the folder. And the optional third
# argument is a set of non-required options.
config.vm.synced_folder "./", "/Data" # if you want another folder to be shared, just edit ./ to point there
# Provider-specific configuration so you can fine-tune various
# backing providers for Vagrant. These expose provider-specific options.
# Example for VirtualBox:
#
# config.vm.provider "virtualbox" do |vb|
# # Display the VirtualBox GUI when booting the machine
# vb.gui = true
#
# # Customize the amount of memory on the VM:
# vb.memory = "1024"
# end
#
# View the documentation for the provider you are using for more
# information on available options.
# Enable provisioning with a shell script. Additional provisioners such as
# Ansible, Chef, Docker, Puppet and Salt are also available. Please see the
# documentation for more information about their specific syntax and use.
config.vm.provision "shell", inline: <<-SHELL
dpkg --add-architecture i386
apt-get update
apt-get install -y unicorn fish build-essential jq strace ltrace curl wget rubygems gcc dnsutils netcat gcc-multilib net-tools vim gdb gdb-multiarch python3 python3-pip python3-dev libssl-dev libffi-dev wget git make procps libpcre3-dev libdb-dev libxt-dev libxaw7-dev libc6:i386 libncurses5:i386 libstdc++6:i386
pip3 install keystone-engine unicorn capstone ropper
git clone https://github.com/radare/radare2 && cd radare2 && sys/install.sh
cd .. && git clone https://github.com/pwndbg/pwndbg && cd pwndbg && git checkout dev && ./setup.sh
python3 -m pip install --upgrade pwntools
SHELL
end
- Put that file in the same folder you want to be shared with your VM.
- Open up a command prompt (terminal or cmd),
cd
to that folder, and typevagrant up
. - Type
vagrant ssh
to ssh into the Linux box, and there you go! Now you have a working Linux VM you are SSHed in. The shared folder is in/data
Any time you need a Linux shell, you can just cd
to that folder and then type vagrant ssh
.
When you are finished using vagrant use exit
to exit the ssh connection and then run vagrant halt
. If you are running into problems with your vagrant instance or you have updated the VagrantFile you will want to restart your instance by running the halt and then the up command.
pwngdb an awesome gdb plugin for reverse engineering (super helpful later on) is installed on this VM if you would like to disable it, add a "
at the beginning of the ~/.gdbinit.
Python
Python is convient for programmatically solving challenges or automating the boring stuff. It’s recommended to get familiar with the fundamentals of the language.
As with everything here, the best way to learn is to practice.
If you’re already familiar with python, here are some useful libraries we recommend:
pwntools
Pwntools automates a lot of boilerplate code one would need for binary exploitation challenges:
>>> from pwn import *
>>> conn = remote('ftp.ubuntu.com',21)
>>> conn.recvline()
b'Please dont pwn me'
>>> conn.send(malicious_payload)
>>> conn.interactive()
b'eeek, ive been hacked'
$ echo 'gotcha' # <--- interactive shell!
Z3Py
Z3 is a constratins solver, which can be useful for a variety of challenges. Essentially, you give Z3 a list of constraints and it will spit out a solution:
>>> x = Int('x')
>>> y = Int('y')
>>> solve(x > 2, y < 10, x + 2*y == 7)
[y = 0, x = 7]
>>> p = Bool('p')
>>> q = Bool('q')
>>> r = Bool('r')
>>> solve(Implies(p, q), r == Not(q), Or(Not(p), r))
[q = True, p = False, r = False]